2

I am trying to build a 12" disk sander salvaging a metal disk with an attached 3/4" shaft, and electric hand drill that has 1/2 inch chuck. What is the best way to reduce the diameter of the shaft? Is there a compatible adapter- sleeve/reducer that is available?

enter image description here

isherwood
  • 119,766
  • 7
  • 148
  • 349

2 Answers2

3

Big mistake reducing that shaft.

First, you have a serious misfit between the application and the drive motor. A 1/2" drill simply does not have the torque or overall power required to turn a 12" sanding disc. The tool is going to bog and stall out anytime you try to use it.

Now, you see lots of Youtube videos where people make bench sanders out of 1/2" drills... that's great, except those guys are using common 5" sanding discs (you can tell by the 5 or 8 holes)*. To drive your 12" disc, you will need a much larger tool. In fact, if you look at 12" disc sanders, the nameplate on the motors, you'll see what is a good fit is for those discs - a big 1.25 horsepower 8A motor spinning at 1750 RPM. (which isn't a good match for a 9" angle grinder either, since it spins much faster9" angle gr).

Anyway, the result is that torque will be so high that you're gonna need the 3/4" shaft.

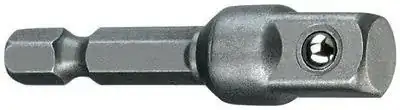
I recommend you use an adapter that will let you leave the 3/4" shaft intact, so you can put it to use once you get a good sized motor.

Also, it's not going to work as a handheld tool. Too small a motor and it won't sand. Too big a motor and it'll kick way too hard.

Harper - Reinstate Monica
  • 276,940
  • 24
  • 257
  • 671
  • Thanks for the inputs. I have seen some YouTube videos using washing machine motor. I think it will have enough power. Agree about the need to mount it firmly rather than a hand held version. – user1409254 May 12 '21 at 02:29
2

There are lots of ways. What's "best" depends on your budget, timeline, skill set, and available tools.

A step-down adapter would do:

enter image description here

Otherwise...

  • Use a grinder to reduce the shaft to a 1/2" hex shape. Mark it out first by tracing a 5/16" nut to be sure it's centered. Use a carpenter's square to keep the faces perpendicular to the sanding disk.
  • Cut the end off flat, then drill and tap for a high-grade 1/4-20 stud. Install a coupling nut on the stud (7/16" dia.). Optionally use thread locking compound to secure parts together.
  • Ask a friend to weld a stud or coupling nut onto the shaft.
  • Epoxy a 12-point hex socket onto the stud, and epoxy a short hex driver adapter into the socket base. Again, use a carpenter's square to be sure everything is perpendicular.

enter image description here

isherwood
  • 119,766
  • 7
  • 148
  • 349
  • I've wondered about this too. Also, what is this step: "tracing a 5/16" nut to be sure it's centered" ? – P2000 May 11 '21 at 19:46
  • Which of those words confound you in particular? Take a 5/6" nut, lay it on the shaft, trace it. This will help keep the grinding in the right place better than if you were to just start carving. – isherwood May 11 '21 at 19:47
  • Question, epoxy is nice, but should it be trusted holding together a rotating tool. – crip659 May 11 '21 at 20:12
  • so the nut is placed flat on the end? centered by eye? is the nut going to be the profile for the new shaft? – P2000 May 11 '21 at 20:28
  • The end of the shaft is tapered. The nut will be more or less self-centering. Good epoxy is virtually as strong as steel. – isherwood May 12 '21 at 12:42